GHIDRA: 🦅 NSA Reverse Engineering tool 🦅
- alvin gitonga
- Jul 31, 2022
- 3 min read
Cyber Morans, Welcome back 😋
If you are new, well...🤗

Today i will quickly walk you through GHIDRA a tool i use to reverse engineer malware. This is an introduction to a series of blogs where i reverse engineer malware that has been a nuisance to the world in the last 5yrs and also that which i have collected from the wild. Stuff like Wannacry, Petya, Dejablue, shodi, virut, allaple, Follina...etc.
So, a quick tutorial...innit...💪
Ghidra is a free and open source reverse engineering tool developed by the National Security Agency (NSA) of the United States. The binaries were released at RSA Conference in March 2019; the sources were published one month later on GitHub. Ghidra is seen by many security researchers as a competitor to IDA pro The software is written in Java using the Swing framework for the GUI. The decompiler component is written in C++. Ghidra plugins can be developed in Java or in Python. Ghidra's existence was originally revealed to the public via WikiLeaks in March 2017, but the software itself remained unavailable until its declassification and official release two years later. Ghidra can be downloaded from its official Web site ghidra-sre.org.

Using GHIDRA
Now it is time to examine the application! To launch Ghidra under Windows, run ghidraRun.bat. Linux users will launch ghidraRun.sh. The project is largely based on Java; therefore, make sure you have the Java Runtime installed 👇

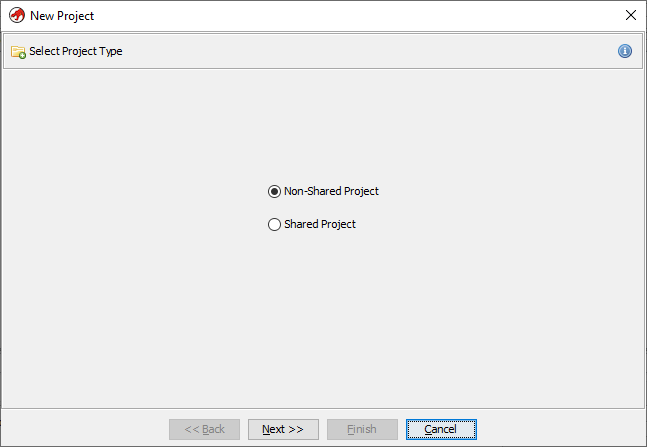
You can even have a shared project with several collaborators 👇

First, the program offers to create a project and add the required binary files for analysis. Then the icon with a green dragon becomes active and opens the CodeBrowser, our main working environment 👇

Initially, we are presented with a window showing the file’s technical information. The tool prompts us to analyze it and select the analysis options. We’ll accept the prompt 👇

The Decompiler window is on the right, we’ll get back to it later. There is also Functions tab in the bottom-right part of the screen, HIT it 👇

Here we see the list of functions with their signatures, which is very handy. Let us select a function and see what happens next 👇

This is the very beginning of the function, containing its signature, parameters and their types, return value, calling conventions, and disassembly listing. The Display Function Graph button is located on top of the screen; I highlighted it on the screenshot. Let us hit it 👇

This is code visualization. Its almost similar to IDA pro
Ghidra also offers lots of searching functionality; to see all available options, you just have to select Search in the framework menu and review the dropdown list. For instance, this is how the string search dialog might look like 👇

Ghidra is able to compute cross references to and from almost any item Ghidra includes a built-in hex viewer; to toggle the hex view, you have to open the Windows → Bytes menu 👇

Ghidra supports the assembly code patching function straight out of the box. To use it, select a code line and press Ctrl + Shift + G or, alternatively, select Patch Instruction in the context menu. There is an interesting visual feature in the program: if you select some code in the Decompiler window, that piece of code is automatically selected in the Disassembly Listing window 👇

conclusion 😛
This is the first series of blogs dedicated to malware analysis and reverse engineering. We will be looking at samples of the most prolific or devastating malware in the last 5yrs. Am talking Petya, virut, shodi, wannacry, dejablue, wisdomeyes, allaple...and milliions more that i will collect in the wild.
Thank you for your time, Like and leave a comment/review and as always, stay awesome! 👊 💪
I'll see you in the next one 😜


Comments